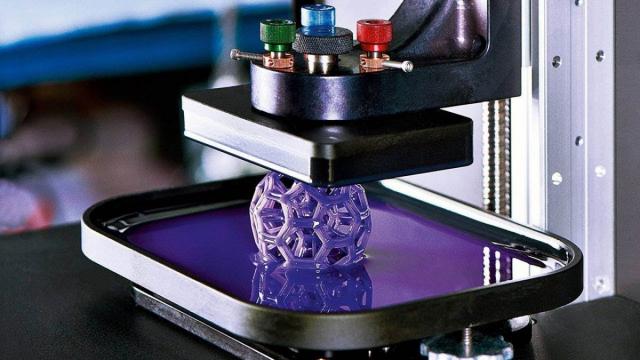
As the Gladstone region transitions into a high-tech manufacturing centre, we have been receiving a lot of questions about rapid prototyping (RP).
RP is a term used to describe a group of techniques that are used to quickly fabricate a product leveraging three-dimensional Computer Aided Design (CAD) and
3D printing.
The physical fabrication is now usually done using additive layer manufacturing technology.
This is a complicated and ‘tech heavy’ topic, but if you are a manufacturer, or are interested in manufacturing, it is worth knowing something about this topic, so we will cover off some of the basics.
RP allows designers to quickly create physical models of their designs, which can then be used for a variety of purposes.
The most common purposes are:
● Visualisation: RP models can be used to visualise a design and to get a better understanding of how it will look and function.
Many products that look good on paper just don’t look right in the real world.
● Functional testing: RP models can be used to test the functionality of a design.
This can be done by testing the fit and function of individual parts, or by testing the overall performance of an assembly.
Often once you give a design to a tester to experiment with the user experience, they will suggest modifications that can only be recommended after a
hands-on trial.
● Manufacturing validation: RP models can be used to validate the manufacturing process for a design.
This can help to ensure that the design can be manufactured cost-effectively and to the desired quality standards.
In reality some designs require a lot of costly manual assembly or are prone to defect occurring in the manufacturing process.
● Marketing and sales: RP models can be used for marketing and sales purposes.
They can be used to create product demonstrations, to show potential customers how a product will work, and to generate excitement about a new product.
Types of Rapid Prototyping
There are a variety of different rapid prototyping techniques, and each has its own advantages and disadvantages.
Now this is where things get quite ‘techy’, but some of the most common techniques include:
● Stereolithography (SLA): SLA is a 3D printing process that uses a laser to cure a liquid resin into a solid object.
SLA is a good choice for creating high-resolution prototypes with smooth surfaces.
● Selective laser sintering (SLS): SLS is a 3D printing process that uses a laser to sinter (fuse) powdered material into a solid object.
SLS is a good choice for creating prototypes with complex geometries that require the use of strong and durable materials.
● Fused deposition modelling (FDM): FDM is a 3D printing process that uses a heated nozzle to extrude molten plastic material onto a build platform.
FDM is a good choice for creating prototypes that are relatively inexpensive and easy to produce.
● Digital light processing (DLP): DLP is a 3D printing process that uses a projector to cure a liquid resin layer by layer.
DLP is a good choice for creating high-speed prototypes with smooth surfaces.
● Laminated object manufacturing (LOM): LOM is a 3D printing process that uses a laser to cut thin sheets of material and then stack them on top of each other to create a solid object.
LOM is also good choice for creating prototypes with complex geometries that require the use of strong and durable materials.
The Rapid Prototyping Process
A typical rapid prototyping process will involve the following steps:
1. Design: The first step is to create a CAD model of the part or product to be prototyped.
There are many CAD software programs available with different functionality and costs.
2. Data preparation: Once the CAD model is complete, it must be converted into a format that can be used by the rapid prototyping machine.
It’s important to match the file type to the machine being used.
3. Prototyping: The next step is to create the prototype.
This is done using the rapid prototyping machine of choice.
4. Post-processing: Once the prototype is created, it may need post-processing.
Sometimes it’s necessary to remove supports, smooth rough surfaces, or add colour.
5. Evaluation: The final step is to evaluate the prototype.
When done well this is likely to involve testing the functionality of the prototype, getting feedback from users, and then making modifications to the design.
Expect to iterate through each of these steps a number of times!
If you own a manufacturing business that has to update the design of your products periodically or are exploring the option of manufacturing a new
product, you need to be aware of how RP works.
Chances are that by combining RP methodology with the new CAD and physical printing technology that have emerged in the last decade you will be able to bring better products to the market, faster, and at a lower cost than would have previously been possible.
If you have a question about starting a business or running your existing business, we’d love to hear from you because we’ll select a new question to answer here every two weeks.
You can submit your question to james@qsb-consulting.com using the subject ‘CQToday’.


